infinity-mirror
Example code for a smart infinity mirror!
Okay, so first of all, here’s some credits:
And here’s the fourm discussion: https://community.home-assistant.io/t/212410?u=ktibow
Okay, now for some pictures:

Now let’s go to the parts.
- (Only tested on) HelTec Wifi Kit 32
- Any USB cable
- Any breadboard
- Any couple male-to-male jumper wires
- (Only tested on) LED strip
- (Only tested on) Infinity mirror to hack
Okay, let’s do this.
Pry apart the infinity mirror
Bottom
- First, remove the battery base. Do that by pushing apart the bottom part, and while you do that, pull away the battery holder.
- Disconnect all of the wires. Just pull/chop them off.
- Push out the stuff. You might need to push on some stuff really hard in order to push out the switch and power plug.
- Make the hole between the base and top bigger for the light strip connector.
Note: Don’t put the battery base back on, not even later.
Middle
- Pry off the coverings. The mirror is made of 3 parts, the middle, and the two covers. Pry off the glue.
- Pull off one of the mirrors. Be very gentle, or you’ll have a scratched-up mirror like I do.
- Detach the provided light strip. Just pull off the adhesive.
Cut and place the light strip
- Place the light strip around the mirror.
- Find which side is the input and output of the LED strip, and cut off any excess. It’s okay to cut off the other connector, too.
- Count the number of LEDs in the strip.
- Peel off the adhesive backing and place the light strip. Make sure to put the connector through the hole you made earlier.
- Route the connector through the light switch hole.
Yahoo! You’ve done most of the hardware.
Set up the connections
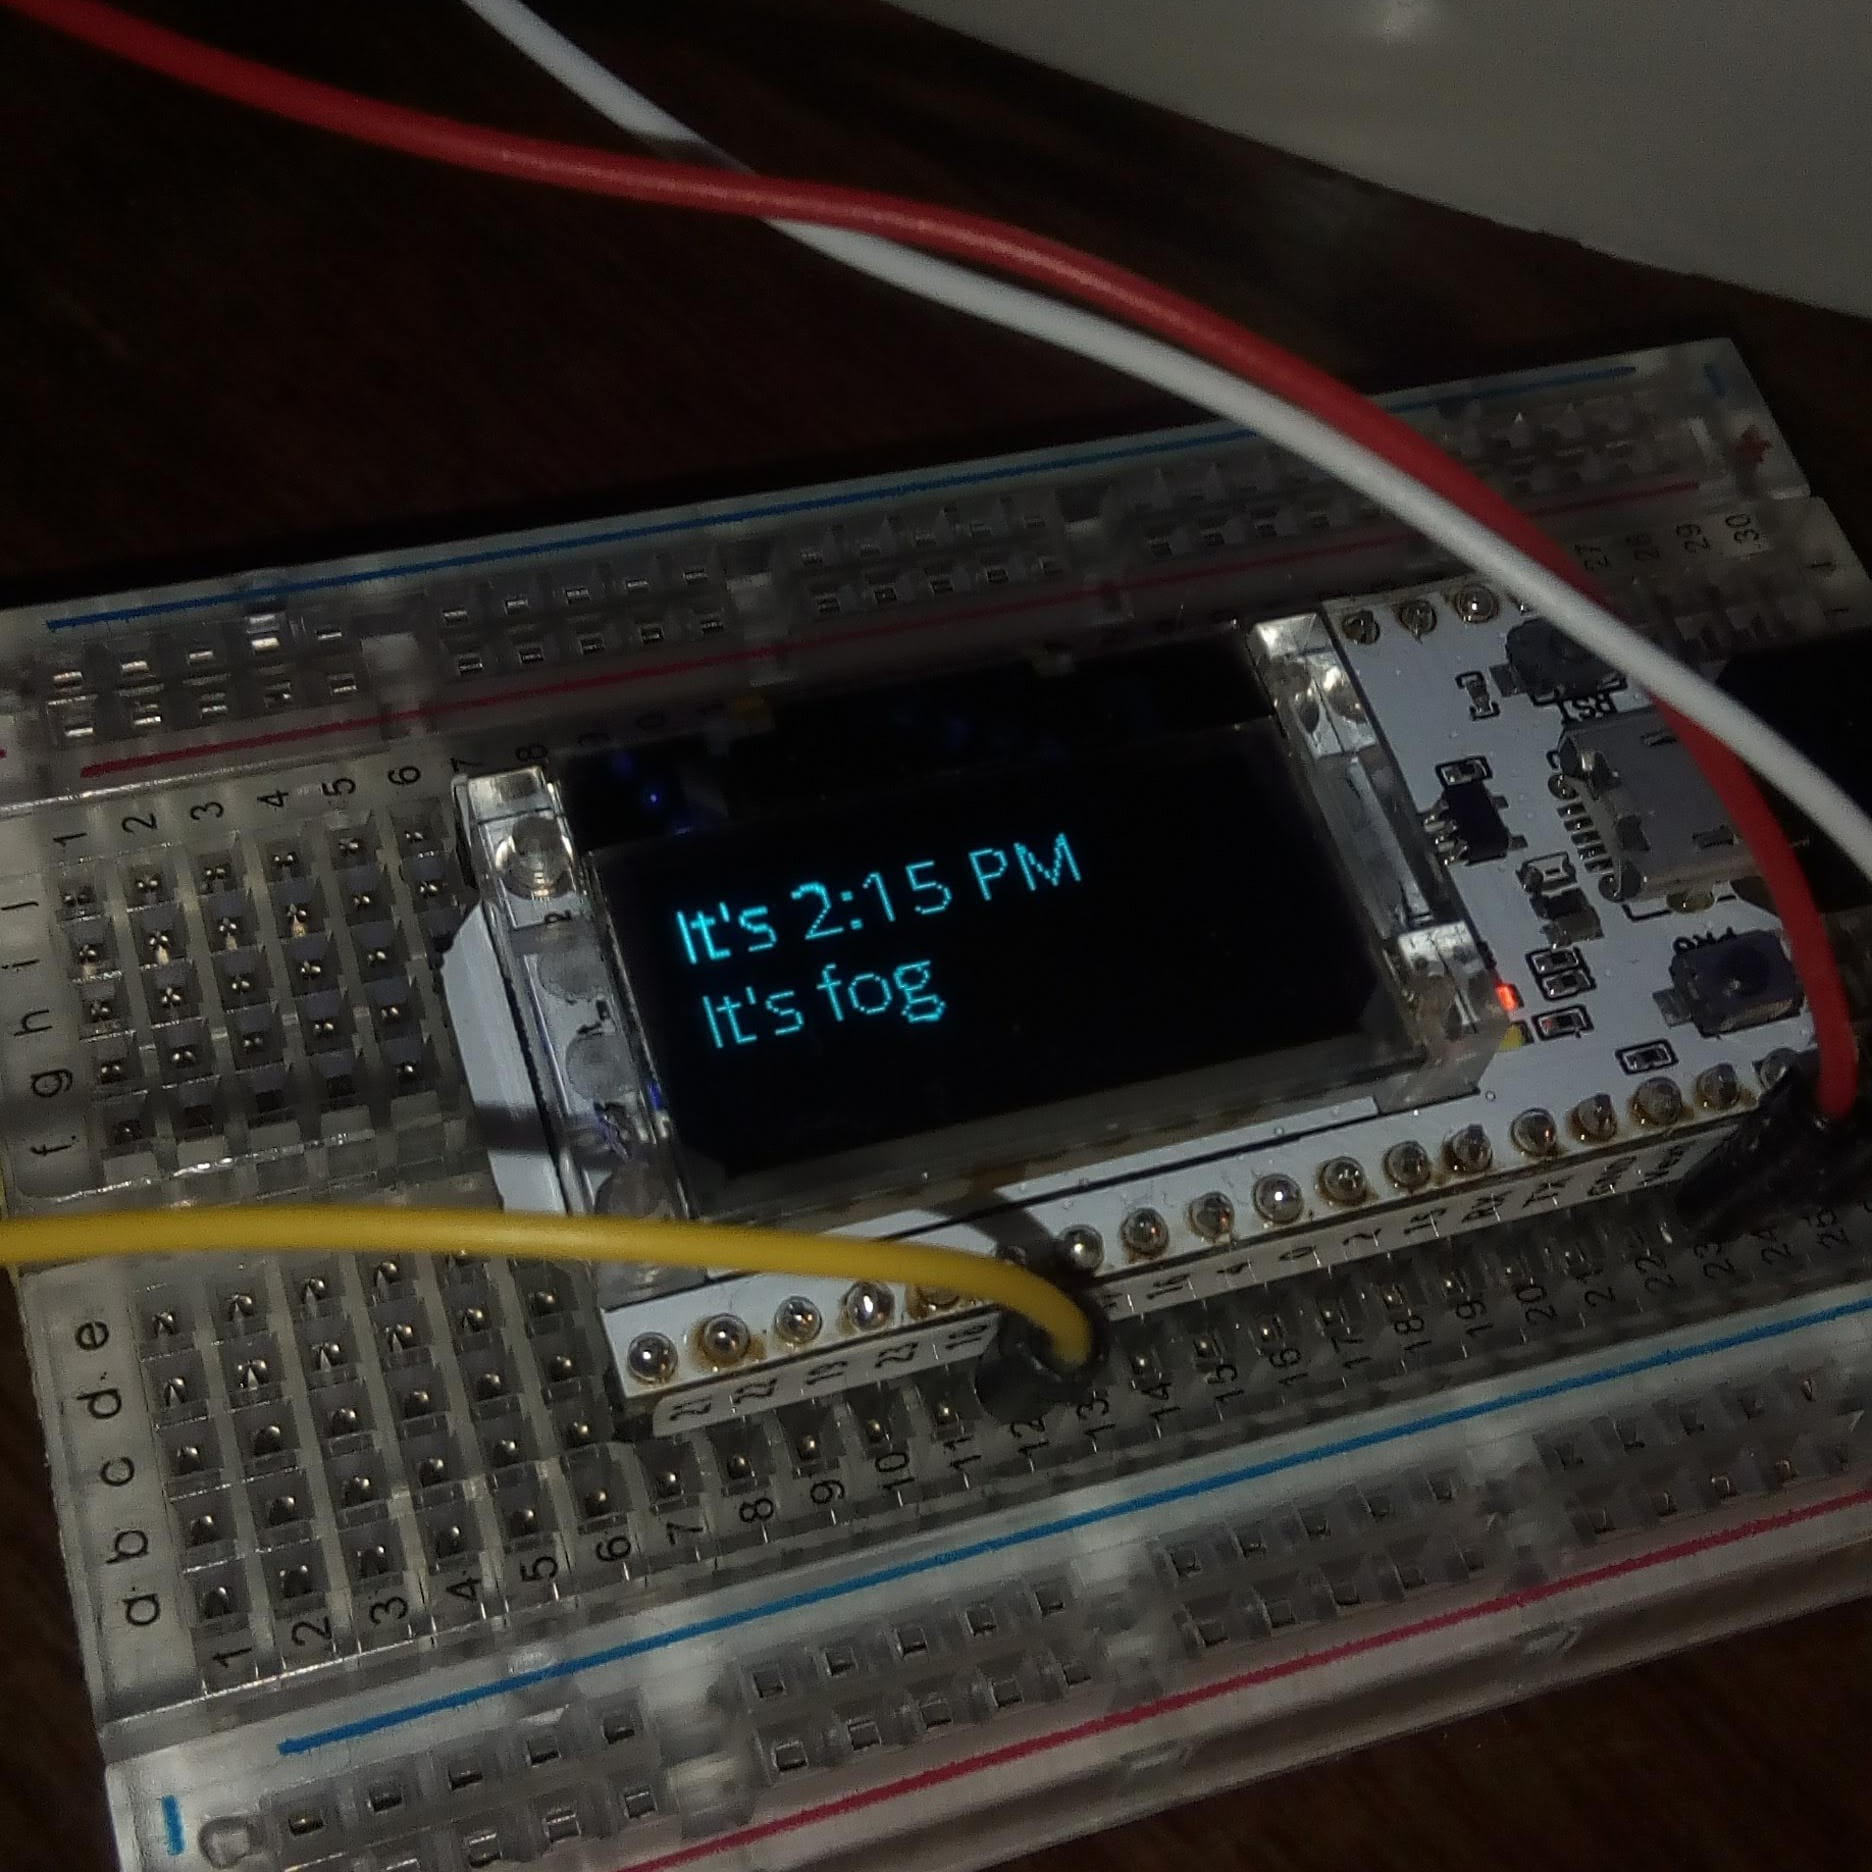
- Find your WiFi Kit 32.
- Place it in the middle of your breadboard.
- If the header’s aren’t soldered on yet, solder them on now.
- Put one wire at pin 5. Put the other two at 5V and GND.
- Put the pin 5 wire to the middle, green wire of the connector.
- Put the 5V wire to the red wire of the connector, and the GND wire to the white wire of the connector.
Set up Home Assistant
- Add the Local IP integration using the GUI.
- Add these
input_number helpers:
input_number.mirror_brightness
- Name: Mirror Brightness
- Icon:
mdi:mirror
- Max value:
255
- Leave everything else
input_number.hue
- Name: Hue
- Icon:
mdi:mirror
- Max value:
255
- Leave everything else
input_number.saturation
- Name: Saturation
- Icon:
mdi:mirror
- Max value:
255
- Leave everything else
- Add these
input_select helpers:
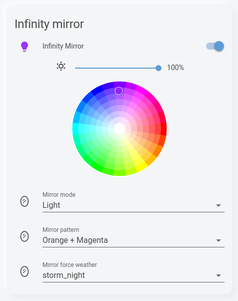
input_select.mirror_force_weather
- Name: Mirror force weather
- Icon:
mdi:mirror
-
Options:
- clear_night
- cloudy
- fog
- lightning
- storm
- storm_night
- mostly_cloudy
- mostly_cloudy_night
- heavy_rain
- rainy
- snowy
- mixed_rain
- sunny
</details>
- Leave everything else
input_select.mirror_mode
- Name: Mirror mode
- Icon:
mdi:mirror
-
Options:
- Light
- Clock
- Weather
- Force weather
- Rainbow
- Random
- More patterns
</details>
- Leave everything else
input_select.mirror_pattern
- Name: Mirror pattern
- Icon:
mdi:mirror
-
Options:
- Cyan and Magenta
- Cyan and Orange
- Cyan and Green
- Cyan and Purple
- Orange and Magenta
- Orange and Green
- Orange and Purple
- Green and Magenta
- Green and Purple
- Purple and Magenta
</details>
- Leave everything else
- Add these
input_text helpers:
input_text.mirror_status
- Name: Mirror status
- Icon:
mdi:mirror
- Maximum length: 10
- Leave everything else
5. Add this stuff to your
configuration.yaml (replace weather.kbfi_hourly with your weather sensor):
```yaml
light:
- platform: template
lights:
infinity_mirror:
friendly_name: Infinity Mirror
value_template: ‘’
level_template: ‘’
color_template: ‘(, )’
turn_on:
service: input_text.set_value
data:
entity_id: input_text.mirror_status
value: ‘on’
turn_off:
service: input_text.set_value
data:
entity_id: input_text.mirror_status
value: ‘off’
set_level:
service: input_number.set_value
data_template:
entity_id: input_number.mirror_brightness
value: ‘’
set_color:
- service: input_number.set_value
data_template:
value: “”
entity_id: input_number.hue
- service: input_number.set_value
data_template:
value: “”
entity_id: input_number.saturation
sensor:
- platform: template
sensors:
mtms:
value_template: ‘||||||||’
shell_command:
update_mirror: ‘/usr/bin/curl -d “info=” “http://192.168.1.97/collect”’
    6. Restart Home Assistant
    7. UI control option #1 (requires `slider-entity-row`, `rgb-light-card`):
yaml
entities:
- entity: light.infinity_mirror
full_row: true
toggle: true
type: ‘custom:slider-entity-row’
- colors:
- hs_color:
- 315
- 85
icon_color: ‘hsl(315, 100%, 75%)’
- hs_color:
- 0
- 77
icon_color: ‘hsl(0, 100%, 75%)’
- hs_color:
- 40
- 85
icon_color: ‘hsl(40, 100%, 75%)’
- hs_color:
- 99
- 85
icon_color: ‘hsl(99, 100%, 75%)’
- hs_color:
- 140
- 85
icon_color: ‘hsl(140, 100%, 75%)’
- hs_color:
- 180
- 80
icon_color: ‘hsl(180, 100%, 75%)’
- hs_color:
- 215
- 80
icon_color: ‘hsl(215, 100%, 75%)’
- hs_color:
- 270
- 80
icon_color: ‘hsl(270, 100%, 75%)’
entity: light.infinity_mirror
justify: center
size: 35
type: ‘custom:rgb-light-card’
show_header_toggle: false
type: entities
```
- UI control option #2 with
light-entity-card:
```yaml
entities:
- entity: light.infinity_mirror
- brightness: true
brightness_icon: weather-sunny
child_card: true
color_picker: true
color_temp: true
color_wheel: true
consolidate_entities: false
entity: light.infinity_mirror
full_width_sliders: false
hide_header: true
persist_features: false
shorten_cards: true
show_slider_percent: true
smooth_color_wheel: false
temperature_icon: thermometer
type: ‘custom:light-entity-card’
white_icon: file-word-box
white_value: true
- entity: input_select.mirror_mode
- entity: input_select.mirror_pattern
- entity: input_select.mirror_force_weather
show_header_toggle: false
title: Infinity mirror
type: entities
9. And add this automation too, so HA can tell the mirror when anything changes:
yaml
- id: ‘let_mirror_know_when_status_changes’
alias: Let mirror know when anything changes
description: ‘’
trigger:
- entity_id: sensor.mtms
platform: state
condition: []
action:
- data: {}
service: shell_command.update_mirror
```
Set up your environment and upload
1. Make sure the [Arduino IDE](https://www.arduino.cc/en/Main/Software) is installed, and set up for HelTec's board. [Here's HelTec's guide.](https://heltec-automation-docs.readthedocs.io/en/latest/esp32+arduino/quick_start.html#via-arduino-board-manager)
2. Download [the zip](https://github.com/KTibow/infinity-mirror/archive/master.zip), unzip it, and open `mirror.ino` in `mirror`.
3. Open `token.h` and change the stuff, and open `mirror.ino` and change the number of LEDS. You might also need to change your gateway, subnet, and DNS IP addresses in `setup.h`.
4. Upload it! ## You're done! Let me know if you have any problems [in an issue](https://github.com/KTibow/infinity-mirror/issues/new). BTW: You can upload via a custom OTA web server with [these instructions](https://github.com/KTibow/esp32-ota#upload-sketch), so you don't have to physically plug it in to your computer as long as it has power.